|

Okay, on the instruction sheet, it says you'll need the following:
Well, I'm the kind of stubborn guy where if a tool is not laying right next to me in the garage, I'd rather do without, so I'll tell you right away, we didn't use much of that stuff at all. Okay, well we did use some basic hand tools... and the jack.... and the stands... and some pizza, but that was it (Just for the record, it helped tremendously to have not only two pair of jack stands, but also two jacks). If you want to get the fancy pants spring compressor, I'm told you can borrow one from your local car parts shop like Autozone but again, we made due without. A regular drill got the job done for us too, although it was a tight fit.
To begin with, you're going to want to put the stands on the frame of the Jeep instead of on the axles so you can put the jack on the axle and allow it to droop to it's furthest extent (Apparently disconnecting the steering at the pitman arm makes axle droop farther, but we must have missed that in the instructions the first go around). We left a jack on the front axle, so we could control how low we wanted it to go.
 |
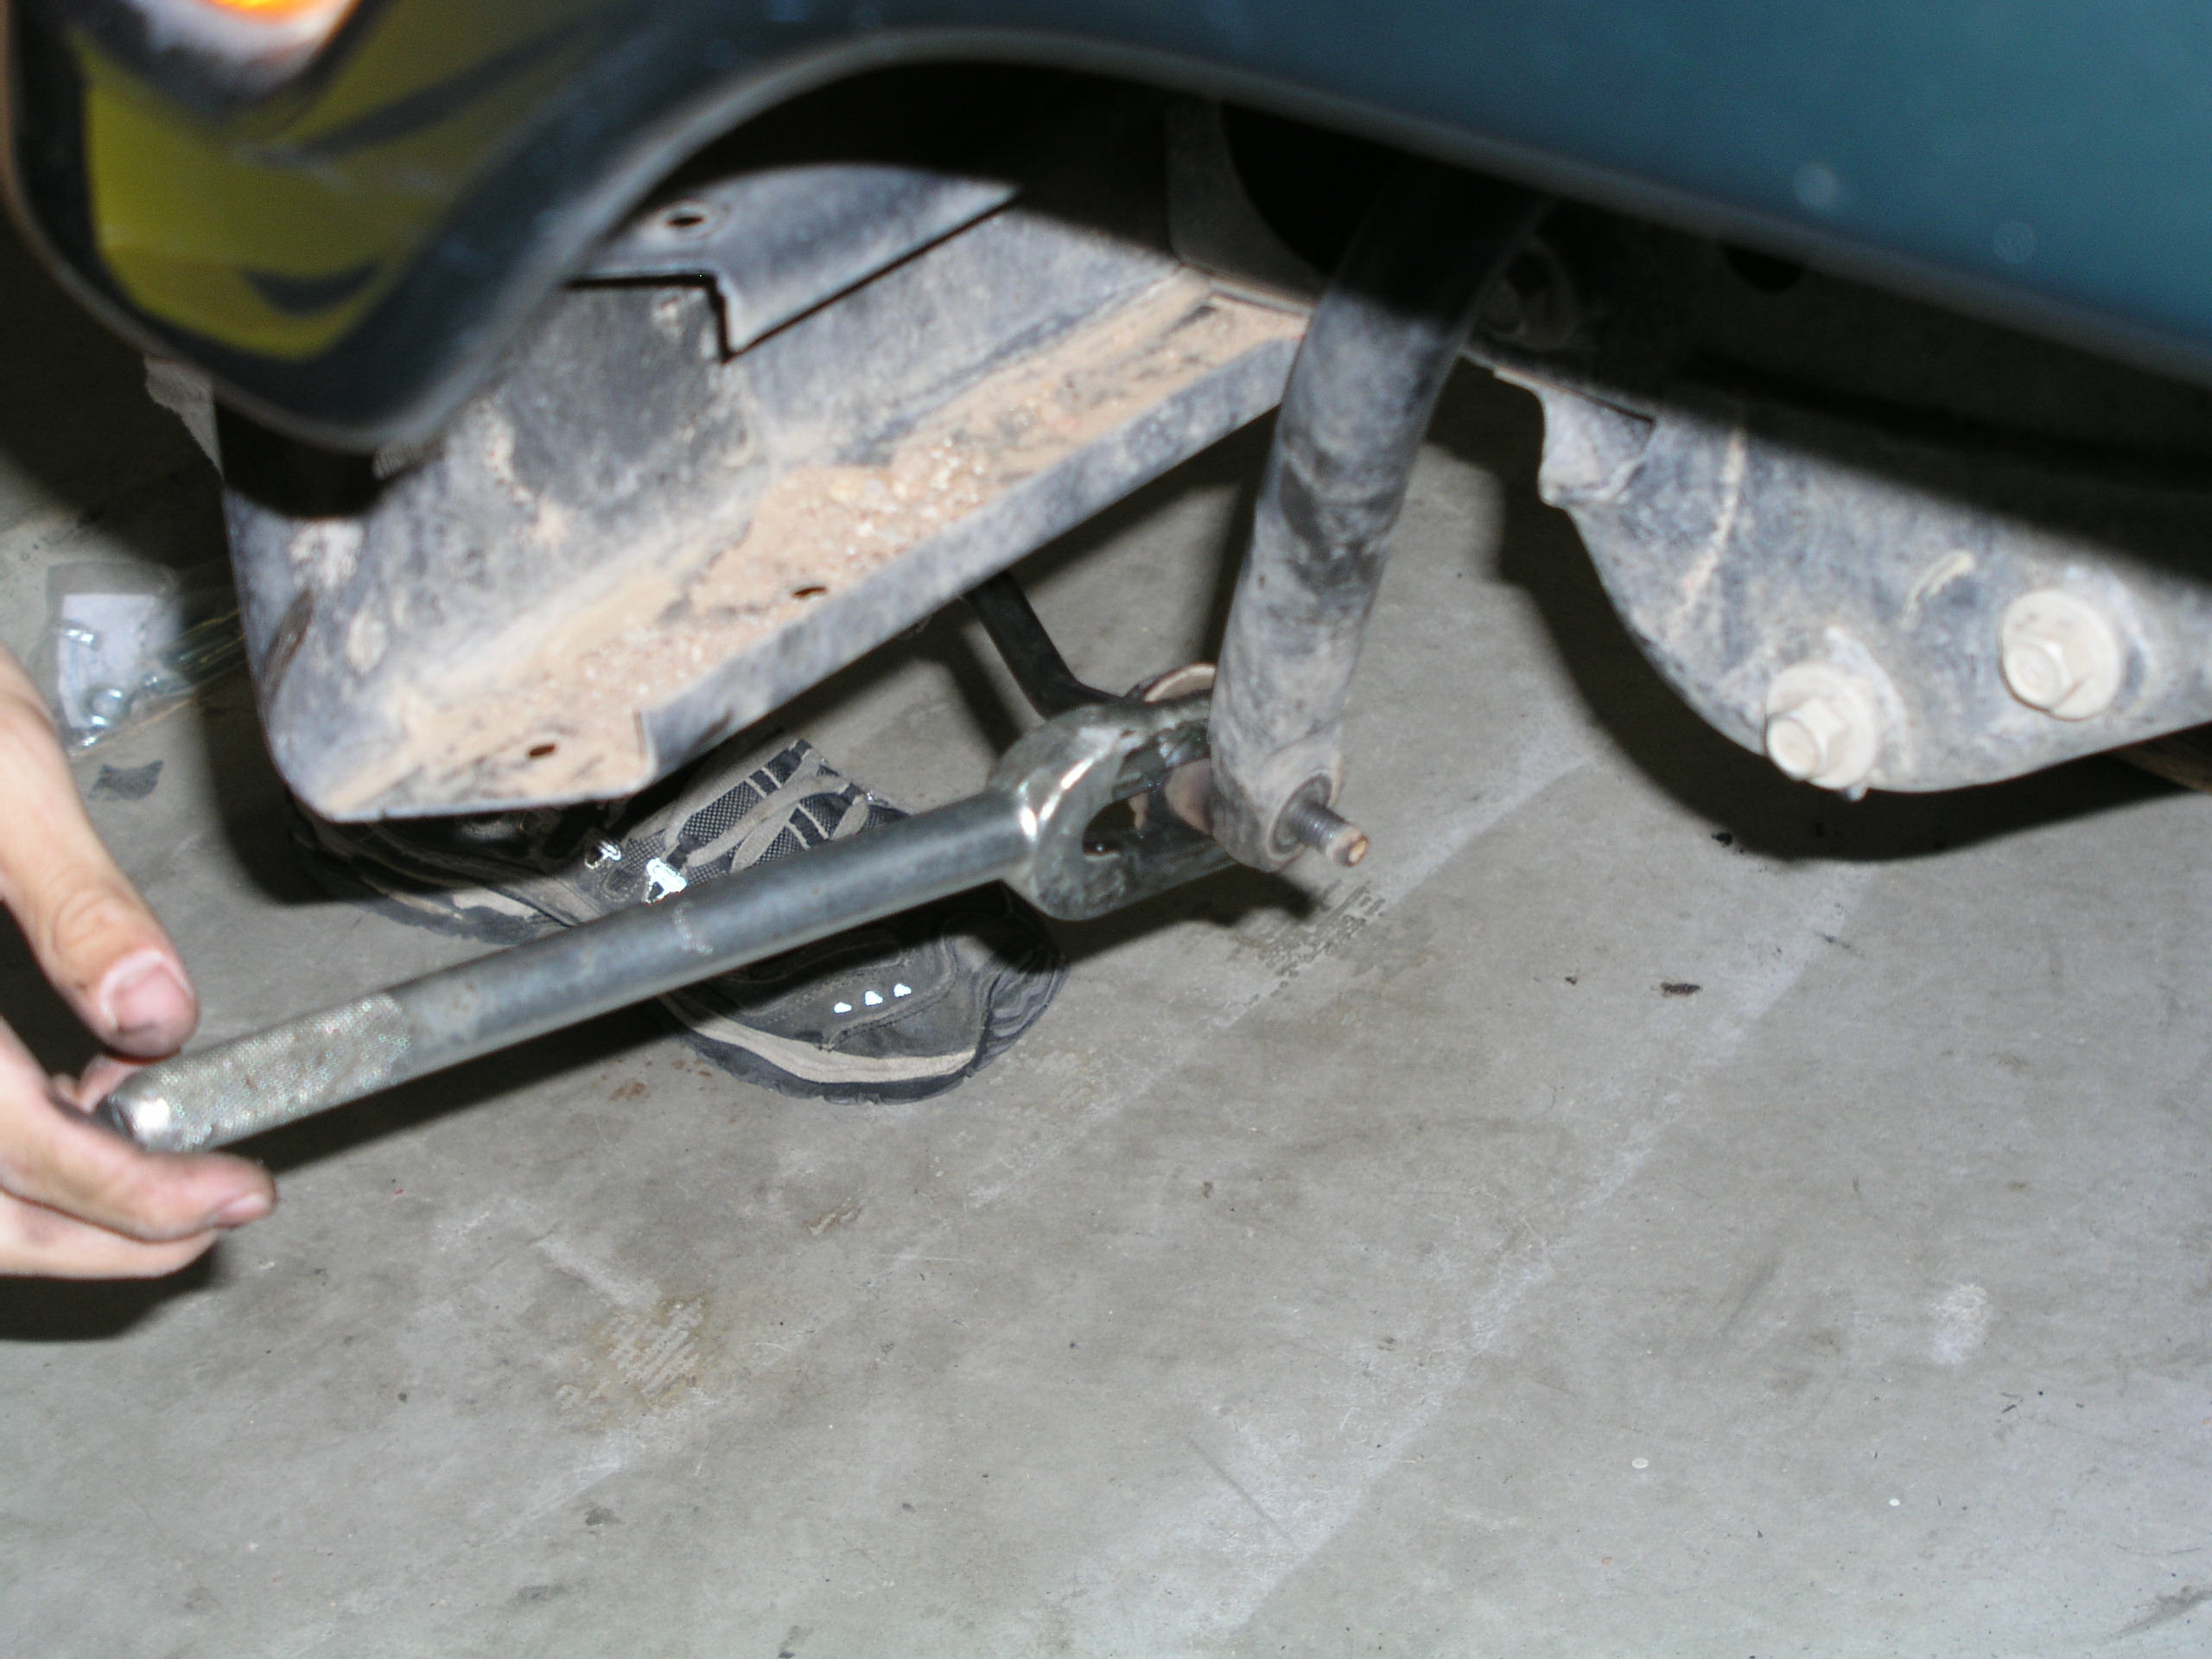
We jacked up the Jeep and removed all the wheels and shocks and then began at the front of the Jeep first. Chris didn't even have disconnects on his sway bar yet, so we had to go about getting some virgin sway by removing the stock sway bar links. Chris learned during this time the real reason that most mechanic shops don't allow you to watch as they operate on your Jeep. Sometimes things have to be coaxed off with a little more force than the average car owner's stomach can take. His links were an excellent example and getting them off required much man-handling. A pickle fork and a sledge finally did the trick and Chris made me reluctantly let the air chisel idea go.
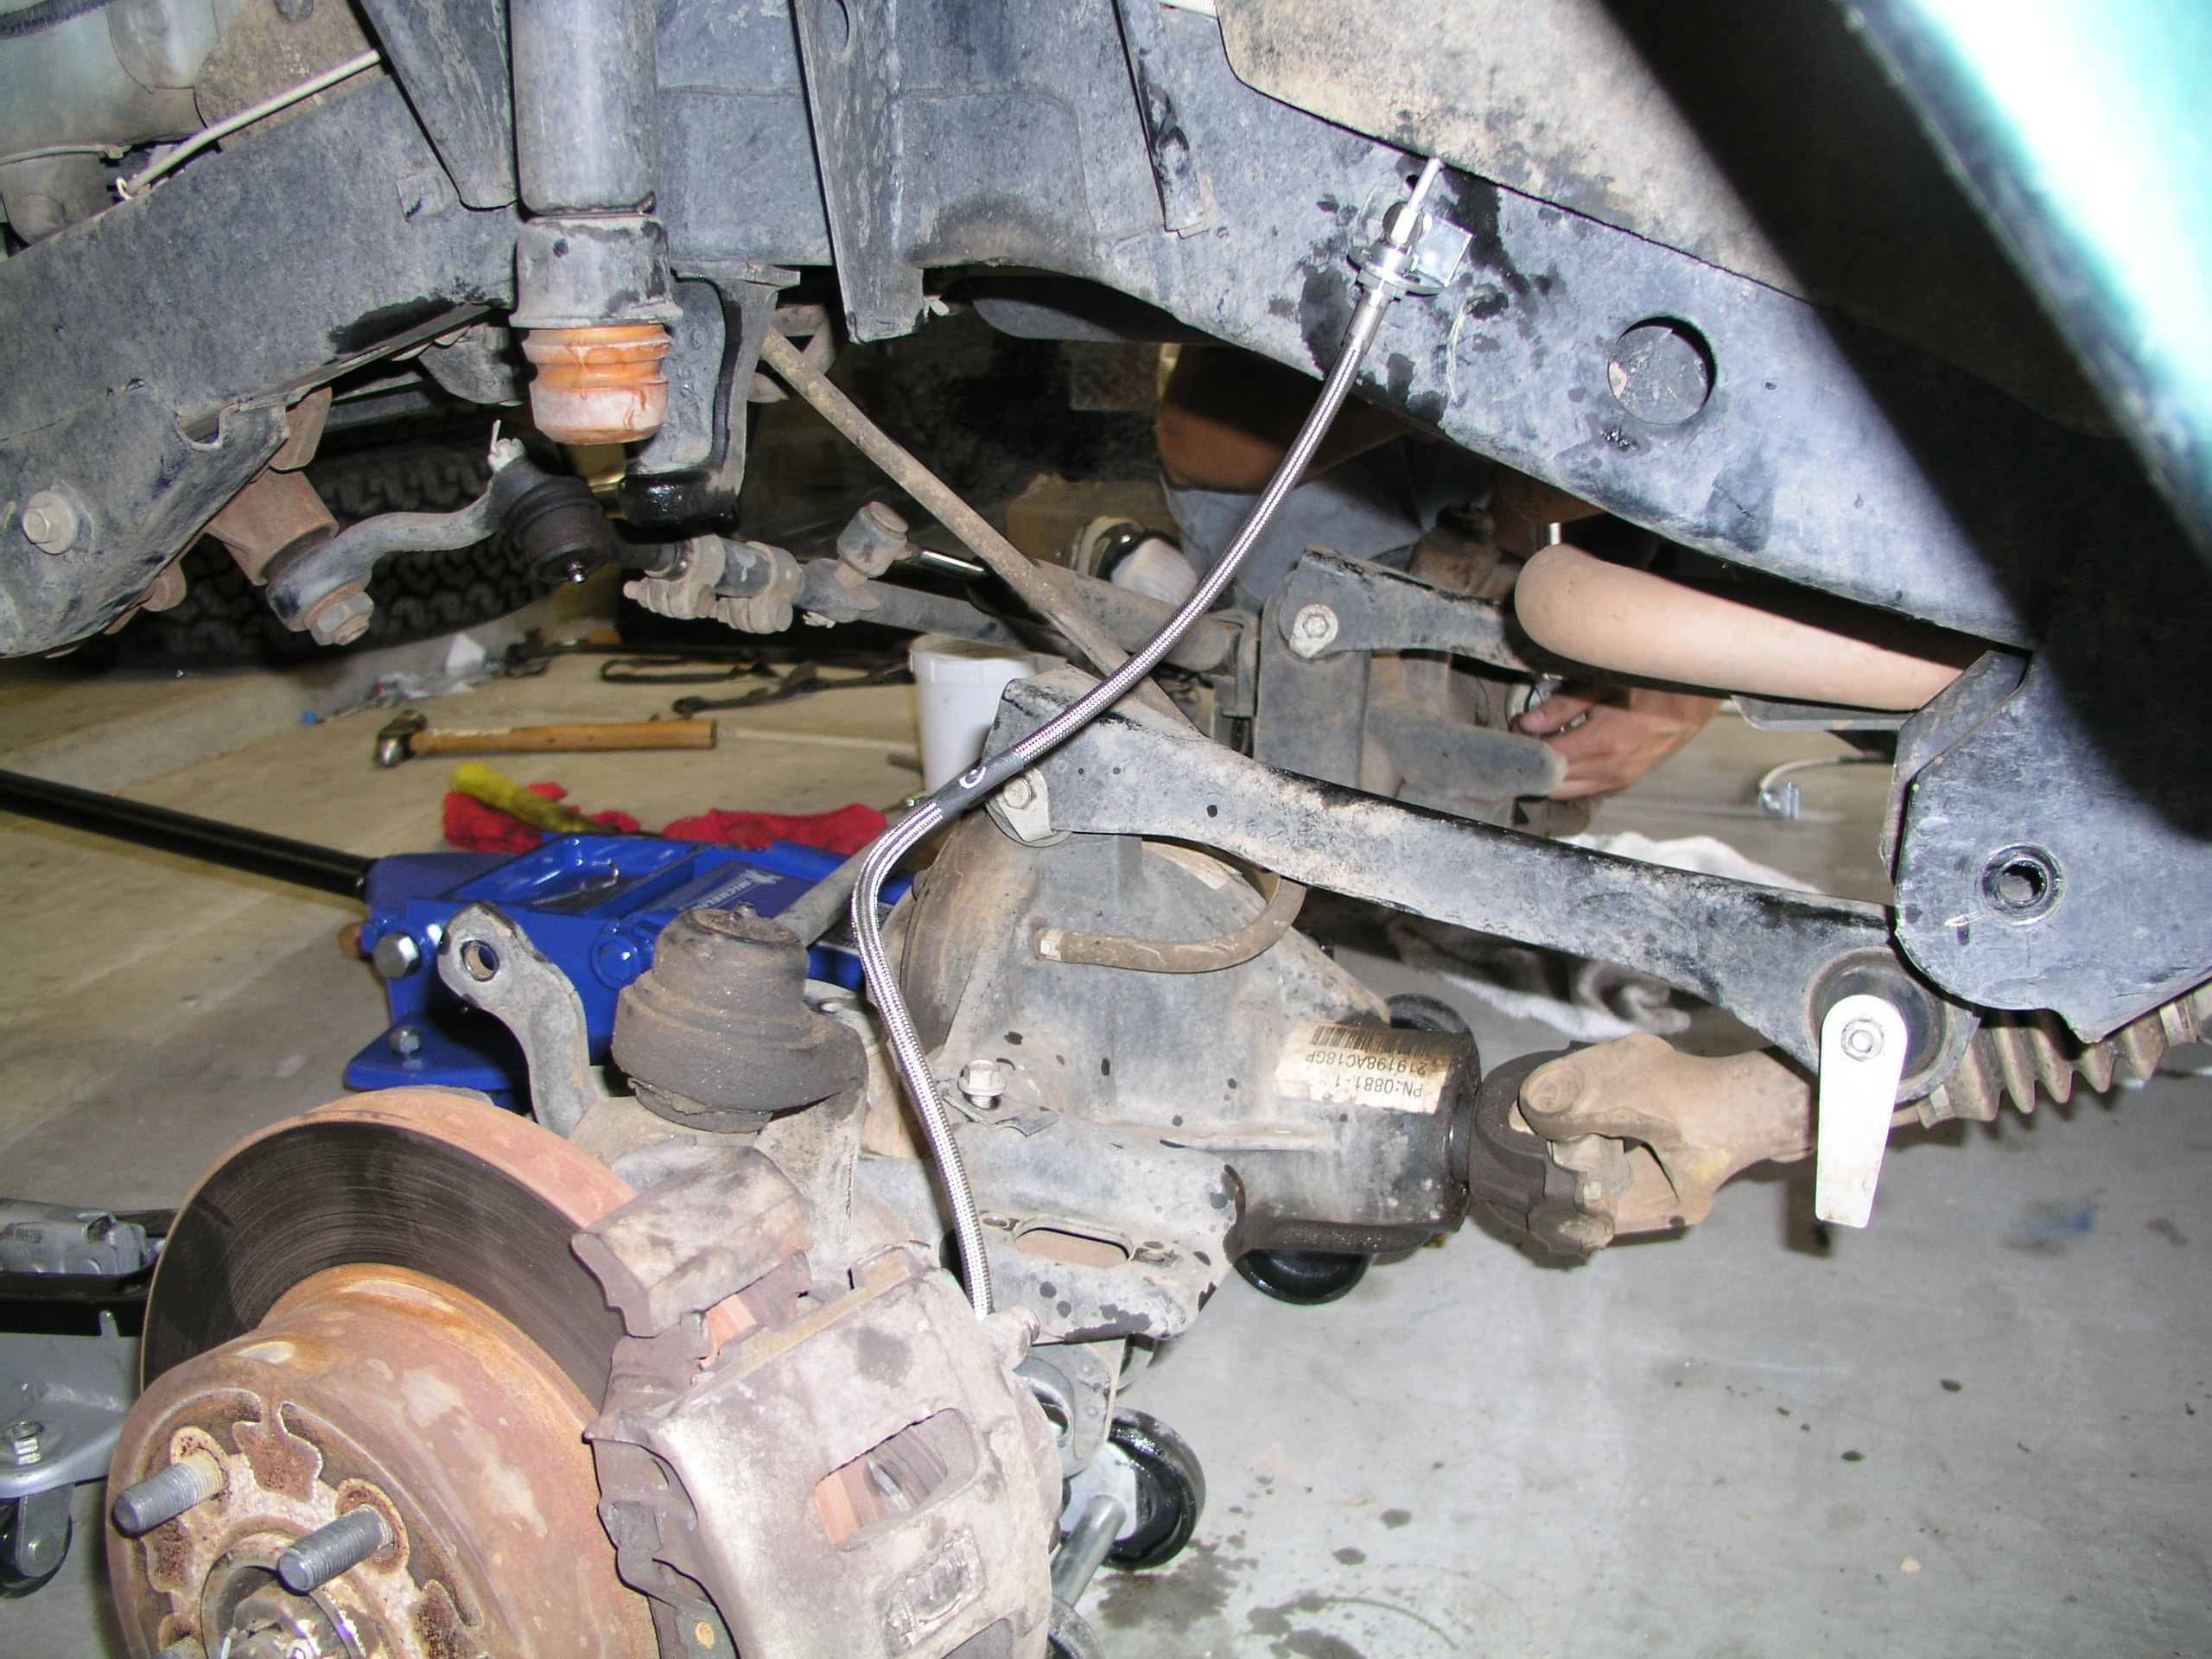
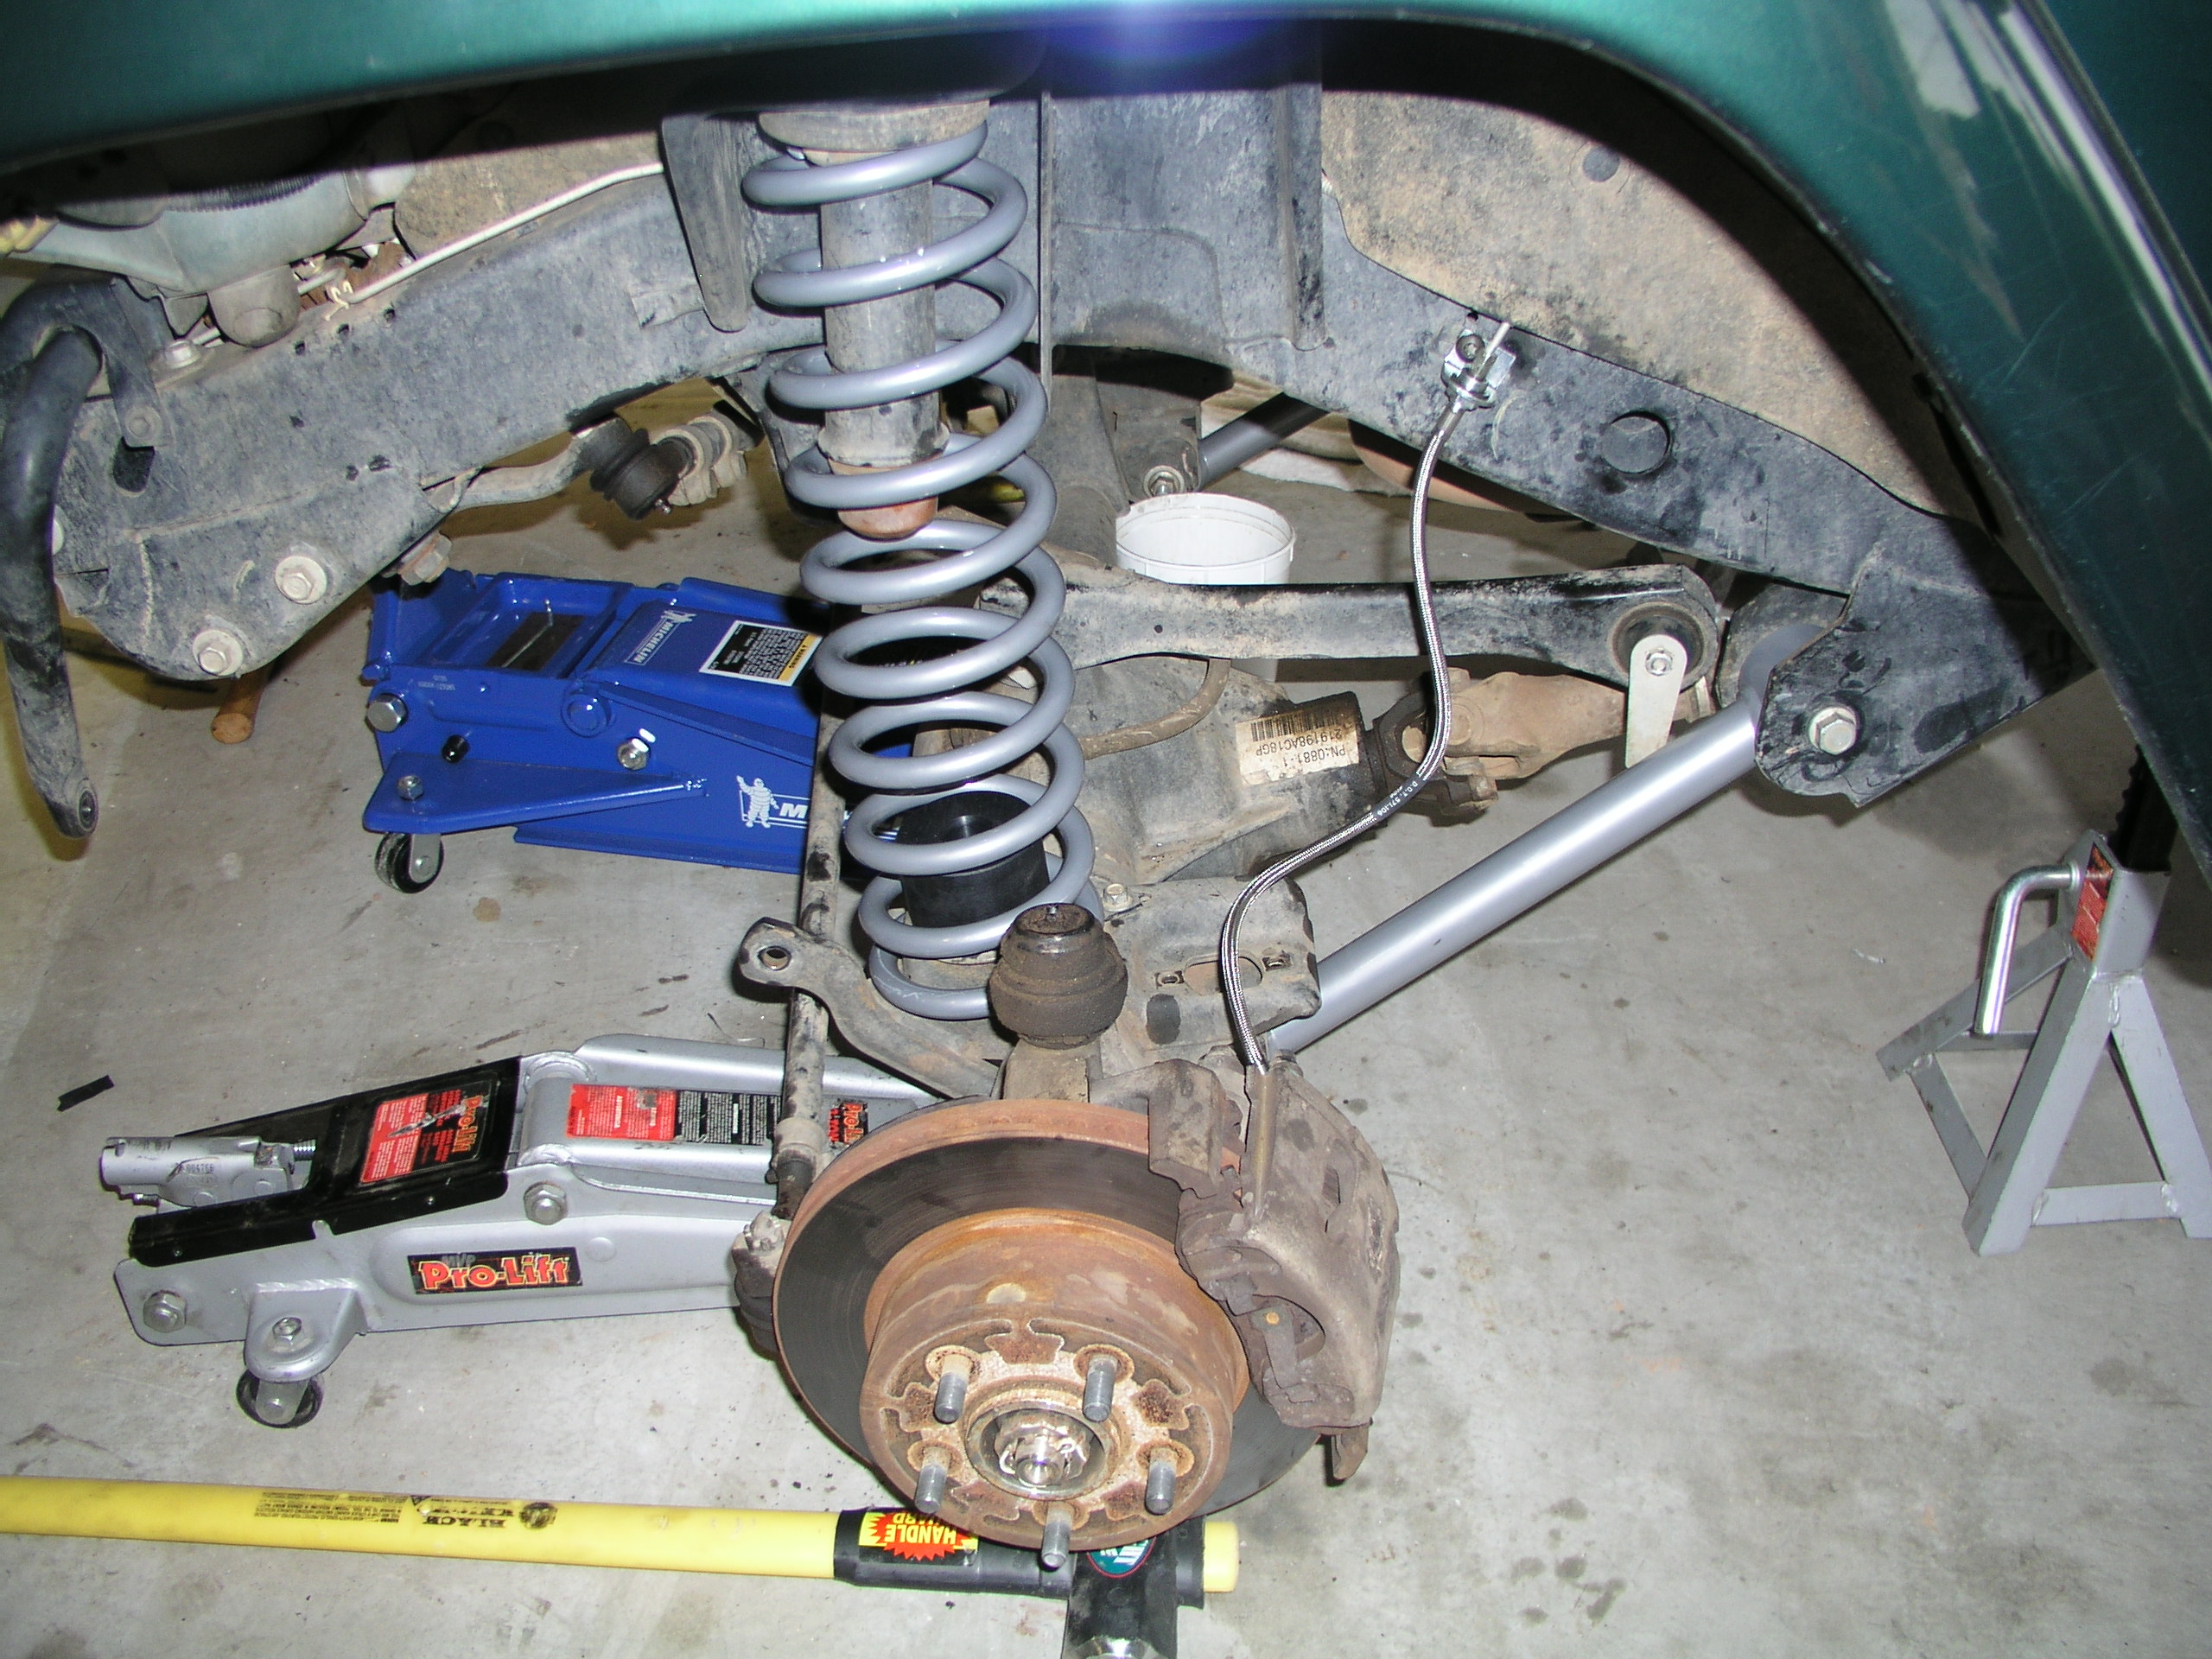
After yanking off the lower control arms, the old brake lines were the next to go, so the longer steel braided ones could go on and actually reach the longer length down to the axle. *Don't forget to bleed the system before you get all excited about taking your "new" Jeep out for a spin!* As soon as you remove the old front track bar can move on to the springs. We removed the front springs by lowering the jack (one side at a time works the best). The old springs come off easily enough, it's the new ones that will have to forced.
Now it's cram time. You get to stuff the new lower control arms in place and then the new springs. Check the pic to make sure you're setting up the control arm right side up.
You will have to drill one hole now in each of the spring pads. This is for the bolt that holds on the supplied bump stop (btw, if you botch up the self tapping bolts, screw it [or rather unscrew it] and put a bolt with a nut on the end in its place). I believe we put the passenger side on first. I mention this because after having one on, the other becomes much harder to slip in because your working against the other. We actually used the second jack to compress the one side so the other would be more willing to accept it's spring. With everything disconnected and the brake disc almost on the floor, it worked easily enough though. Don't forget to put the driver side spring clip back on (although with lots of off road use, you'll probably leave it one day somewhere on the trail).
Great you're halfway there! Eat some more pizza and get ready for the rear. |
 |
 |
 |
You can view RE's install instructions here.

 
|