|
|
|||||||||||||
|
|
|||||||||||||
|
| ||
|
|
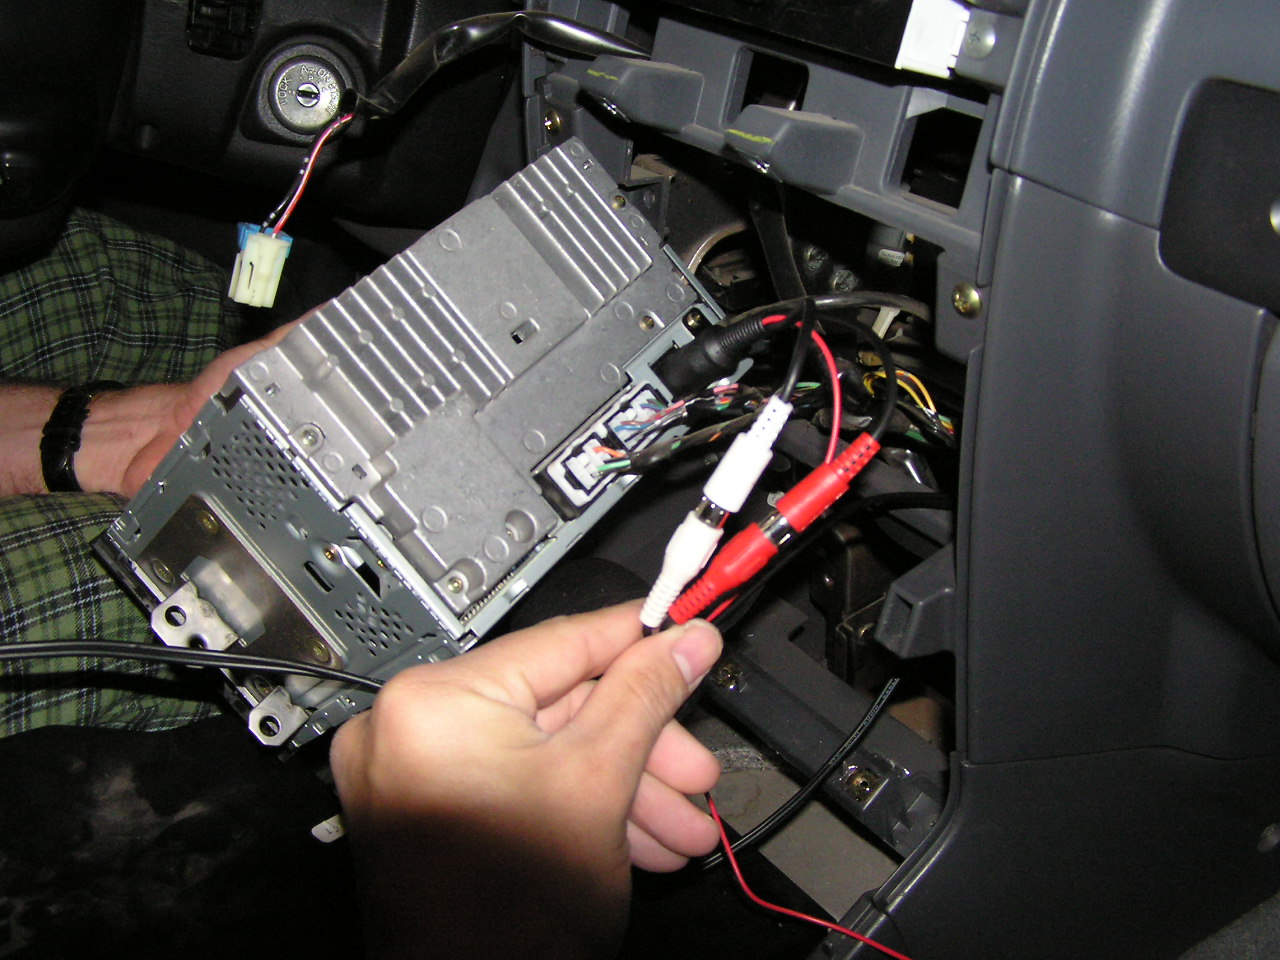
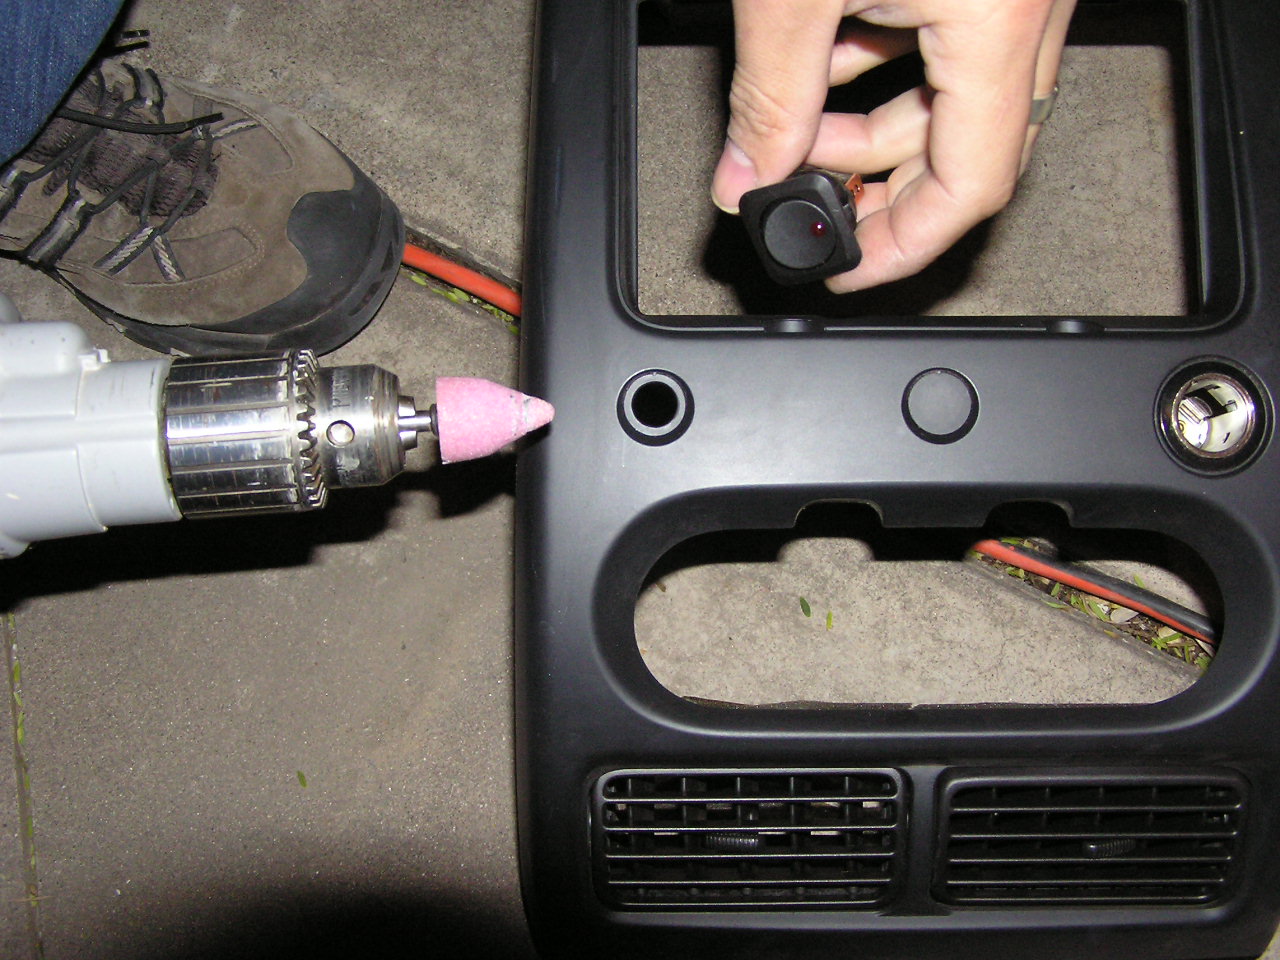
Now you need to coax your radio out of your vehicle. This is done easily by yanking up the plastic molding around your shifter(s). Don't be shy about it, just pull it up and out. If you have 4wd, it will behoove you to push in your e-brake, and drop the tranny into 1st and your t-case into 4Lo to make a little room to work. A couple screws are revealed now that secure the center dash bezel near the bottom. Two more reside above the radio, and then the bezel can be yanked forward. You will have to disconnect the hazard switch and cigarette lighter wire harnesses to fully remove it. 4 more screws are all that "secure" the radio in, and then you can pull that forward to gain access to the 8-din plug. You can now plug your new set-up in and we can move on to installing the auxiliary switch. This is where personal preference comes into play. There are so many different switches to choose from and I've put many different ones in various Jeeps, but I went with one that I had seen installed on someone else's Xterra install. It has a LED indicator for when on and a surround that matches the dash to a T. Steve went with a similar smaller non-lighted one (RS part# 275-693). We both picked up two- one extra for my aftermarket fogs, and one dummy switch for him so he could feel special. Once the dash was out, we drilled out the indents to the right of the cigarette lighter. I had much success with a large cone-shaped grinding stone. Once the holes were big enough, we cleaned them up and just popped the switches in. The non-lighted switches have two posts in the back- one for the lead in, and one for the power out; the lighted one adds a ground. For the powered wire we chose the front cig-lighter/power point since it only gets juice when the ignition is turned. We clipped a small length of wire onto the hot lighter wire and ran it out to the hole where the switch would be. Another wire needs to be run for the ground wire if using a lighted switch. I used an easy to get to bolt near the floor-board. Now you can hook up your switch wires and see how fruitful your efforts were before you move on and reassemble the entire dash. If you did things right, while your radio is on and your switch is turned on, your radio display should read "AUX." |
 |
 | ||
 | ||
 | ||
|
|
|
|
|
|
|
|