|
I had an inkling that I wouldn't be able to drive my new Xterra at stock height for long. I knew I wouldn't be able to when while visiting my friend Steve, his 7-year-old daughter looked out front and asked who's new van was parked out front. Very few new vehicles nowadays look good on their height haunches straight out of the box. I can't even see how people drive stock pavement scraping Jeeps around.
So anyway after researching the big three companies (and their prices) that offered X lifts, I decided to go with Calmini. I was extremely hesitant at first because of the knowledge that they were a sister company to customer service starved Full Traction. But when I raised Calmini on the phone, I got a totally different vibe. I let them know that I almost did not go with them b/c of FT's record with us, but they didn't talk down to me like the voices of FT, but actually acted concerned, thanked me for the info, and told me they would bring up the concern in their next meeting.
Only a few days after placing my order, my lift was already at my door and I was itching to relearn suspension as I knew it. I drove it almost immediately over to Chris's, parked it under the "Only in a Jeep" banner in the garage and got to work. Chris, Jared, and Dana all lent hands almost in rotational shifts assuring that I didn't try to go it alone and/or kill myself.
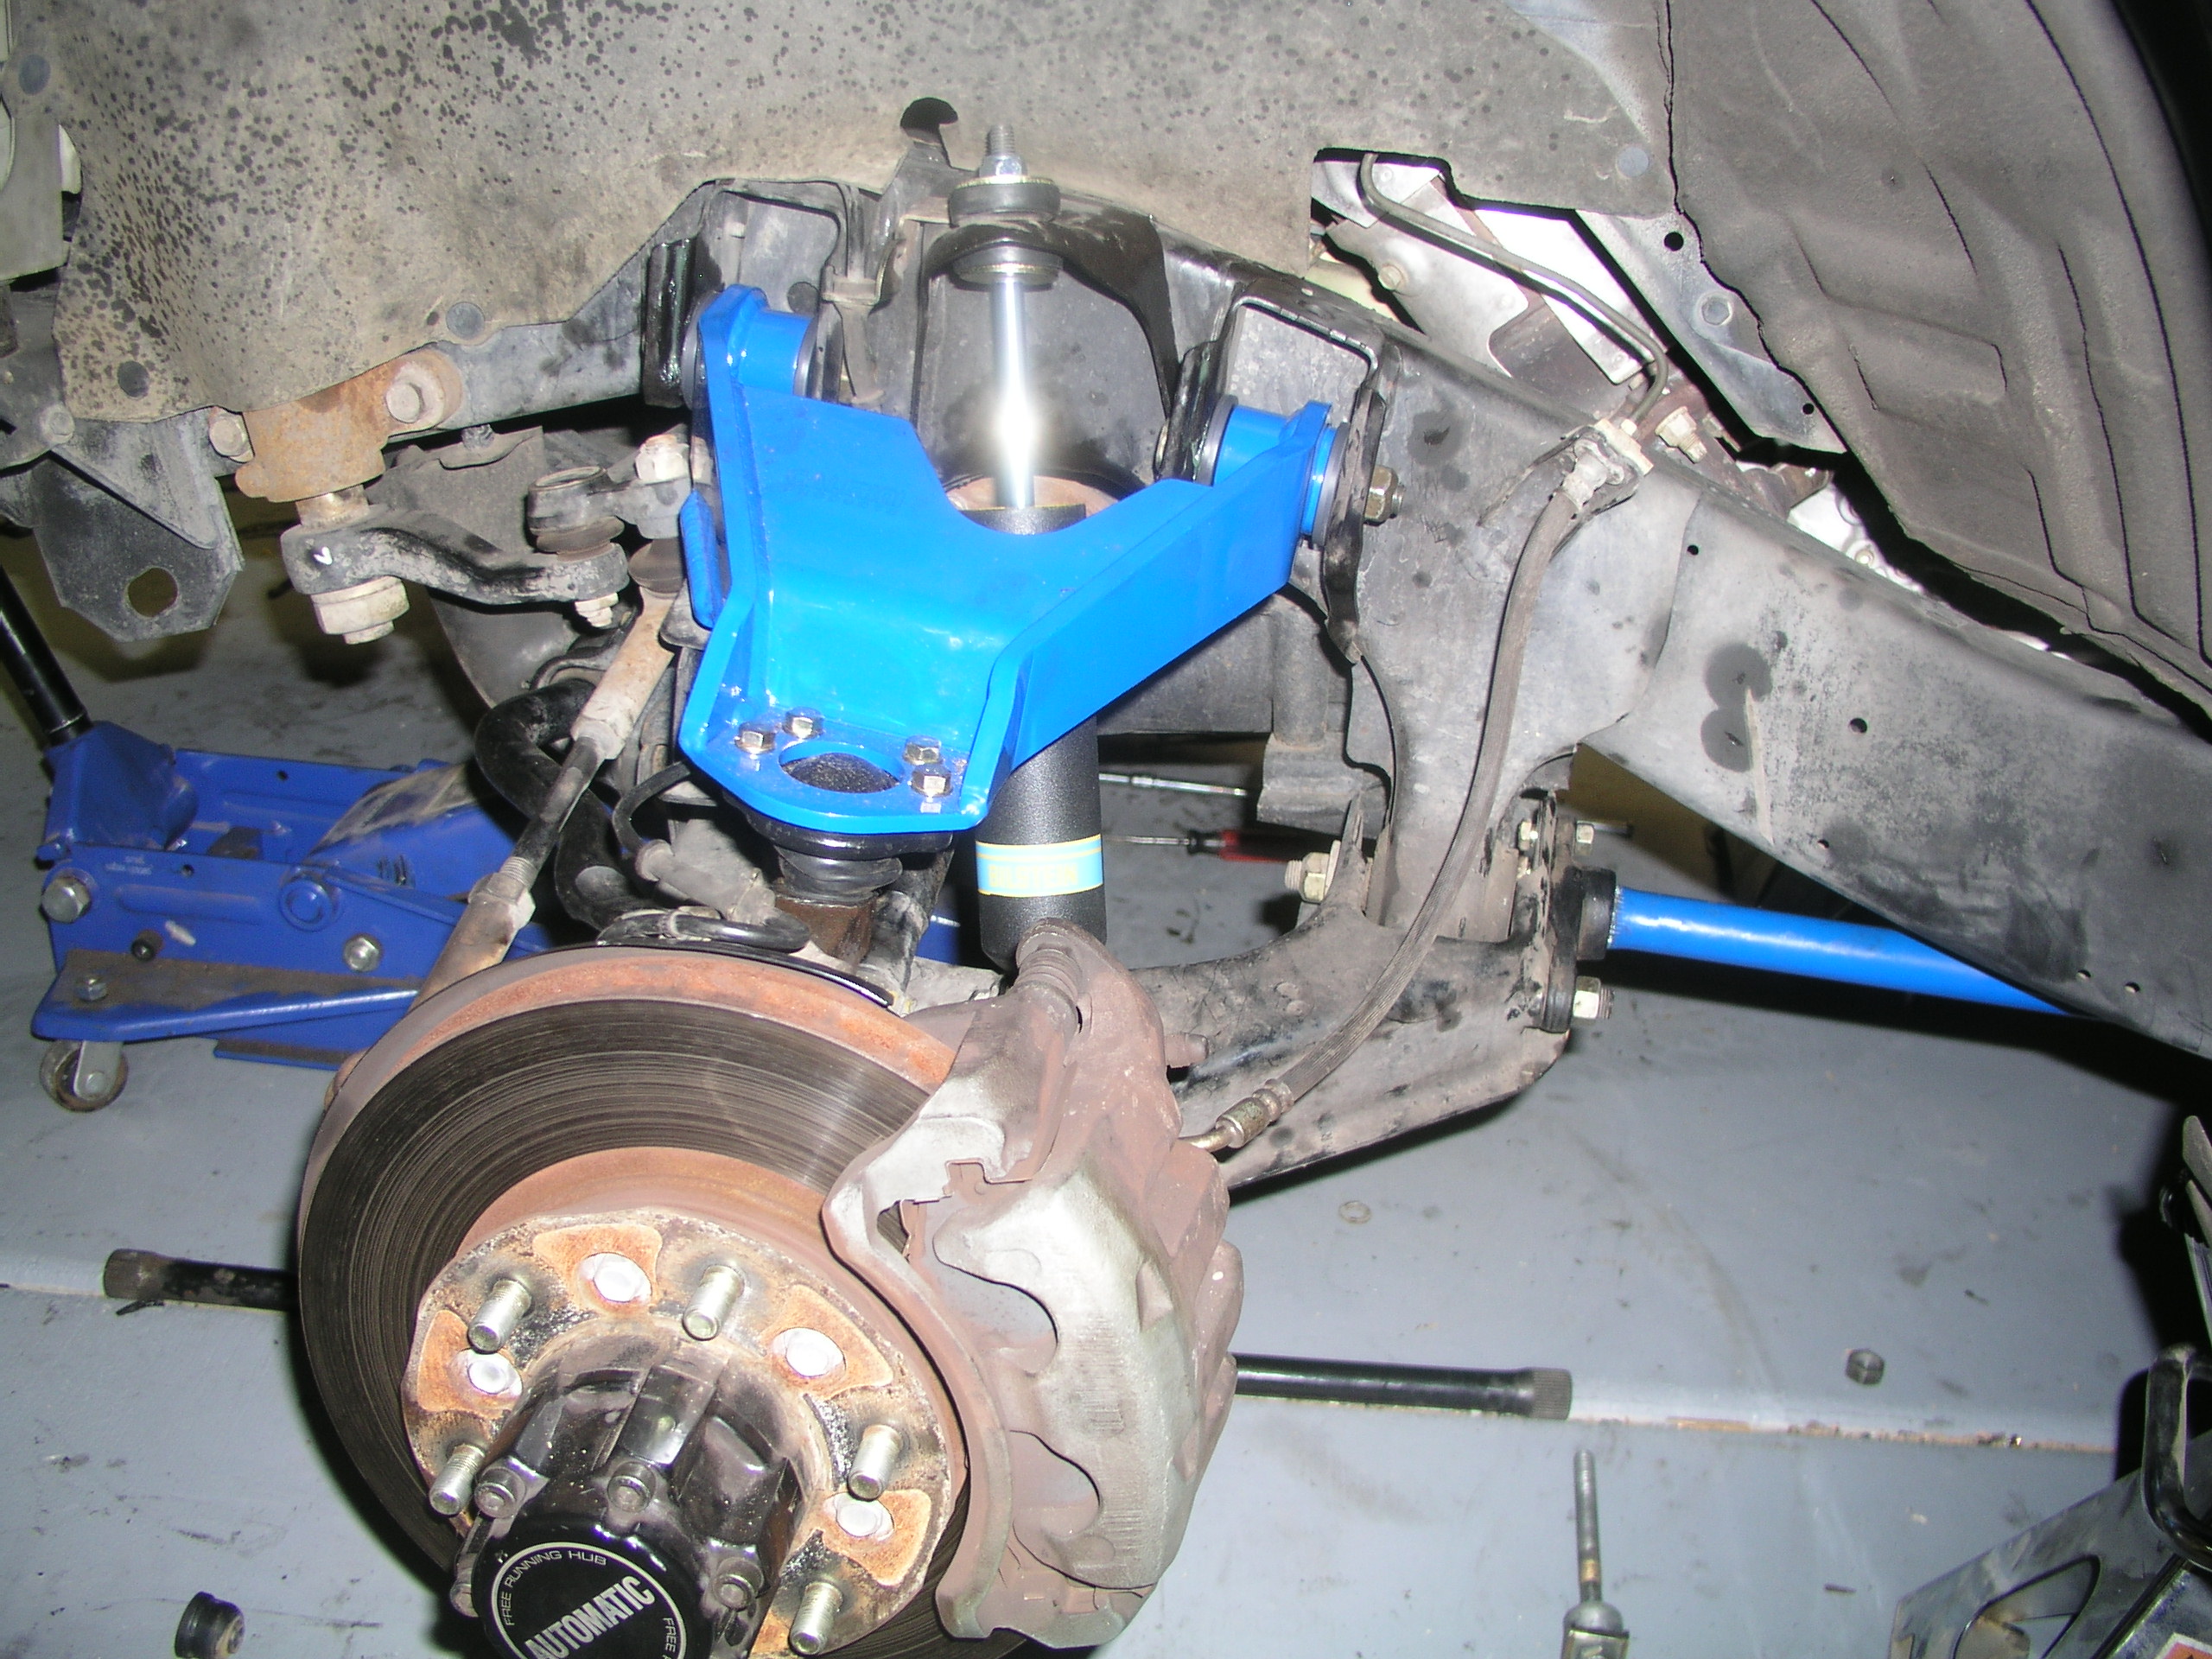
After loosening the font lugs, jacking the X up as high as possible supporting the frame, and removing the wheels, I took a look at my new IFS underworld. When the, "What the %@#* is that?," "Where's the...?," " What in the world does this do?" 's finally past and I got my bearings, I began my work.
Remove the Front Sway Bar:
Piece of cake, been there done that. 4 bolts at the frame, 2 on the links and Next.
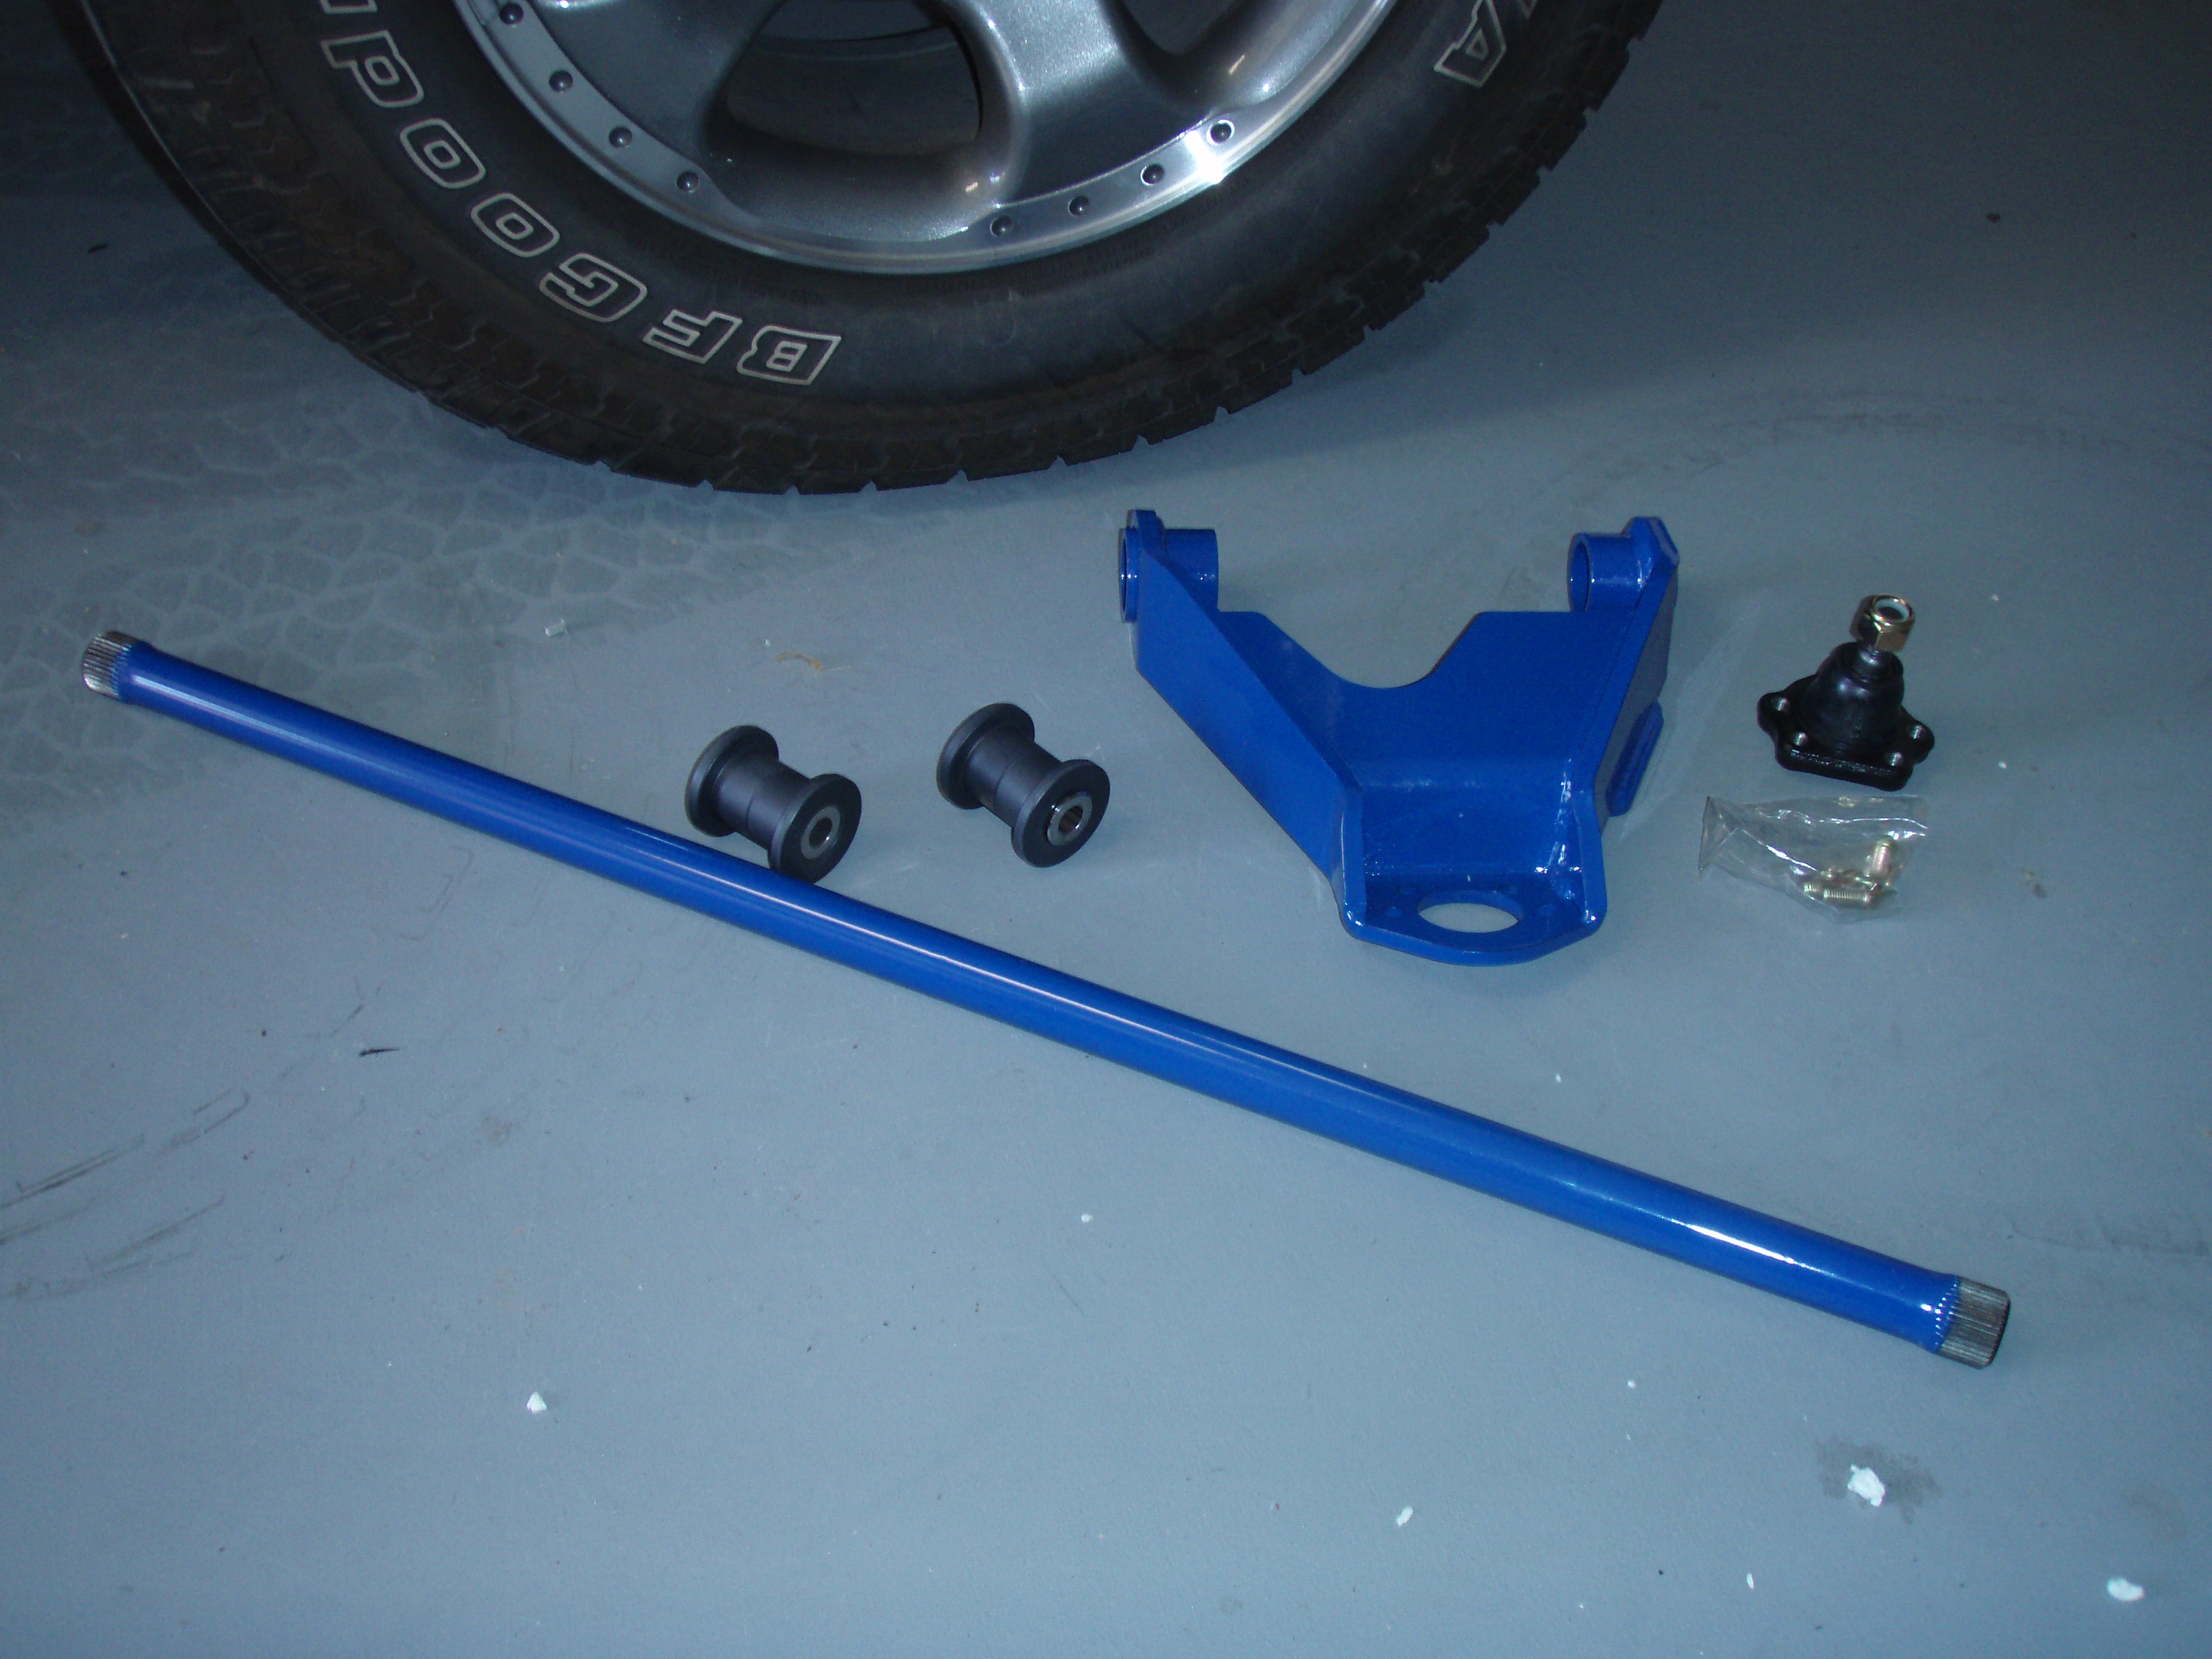
Remove/Install the Stock Torsion Bars:
This is accomplished by removing the rear anchor mount (the crazy frame crossmember rotating spline mount). You must first remove the double nut on the top of the seated bolt. Then you loosen, but don't remove, the front mount (3 nuts) on the lower control arm. Now with a little pull and push power, you can give the T bar enough slack to drop out. Now you can replace the stock bars with your new blue ones, inserting them first into the rear mounts and playing them forward to meet up with the C arm mount. You can tighten back down the front, but only put the rear anchor bolt in enough to keep the bar hanging there since you will be adjusting it at the very end of the install.
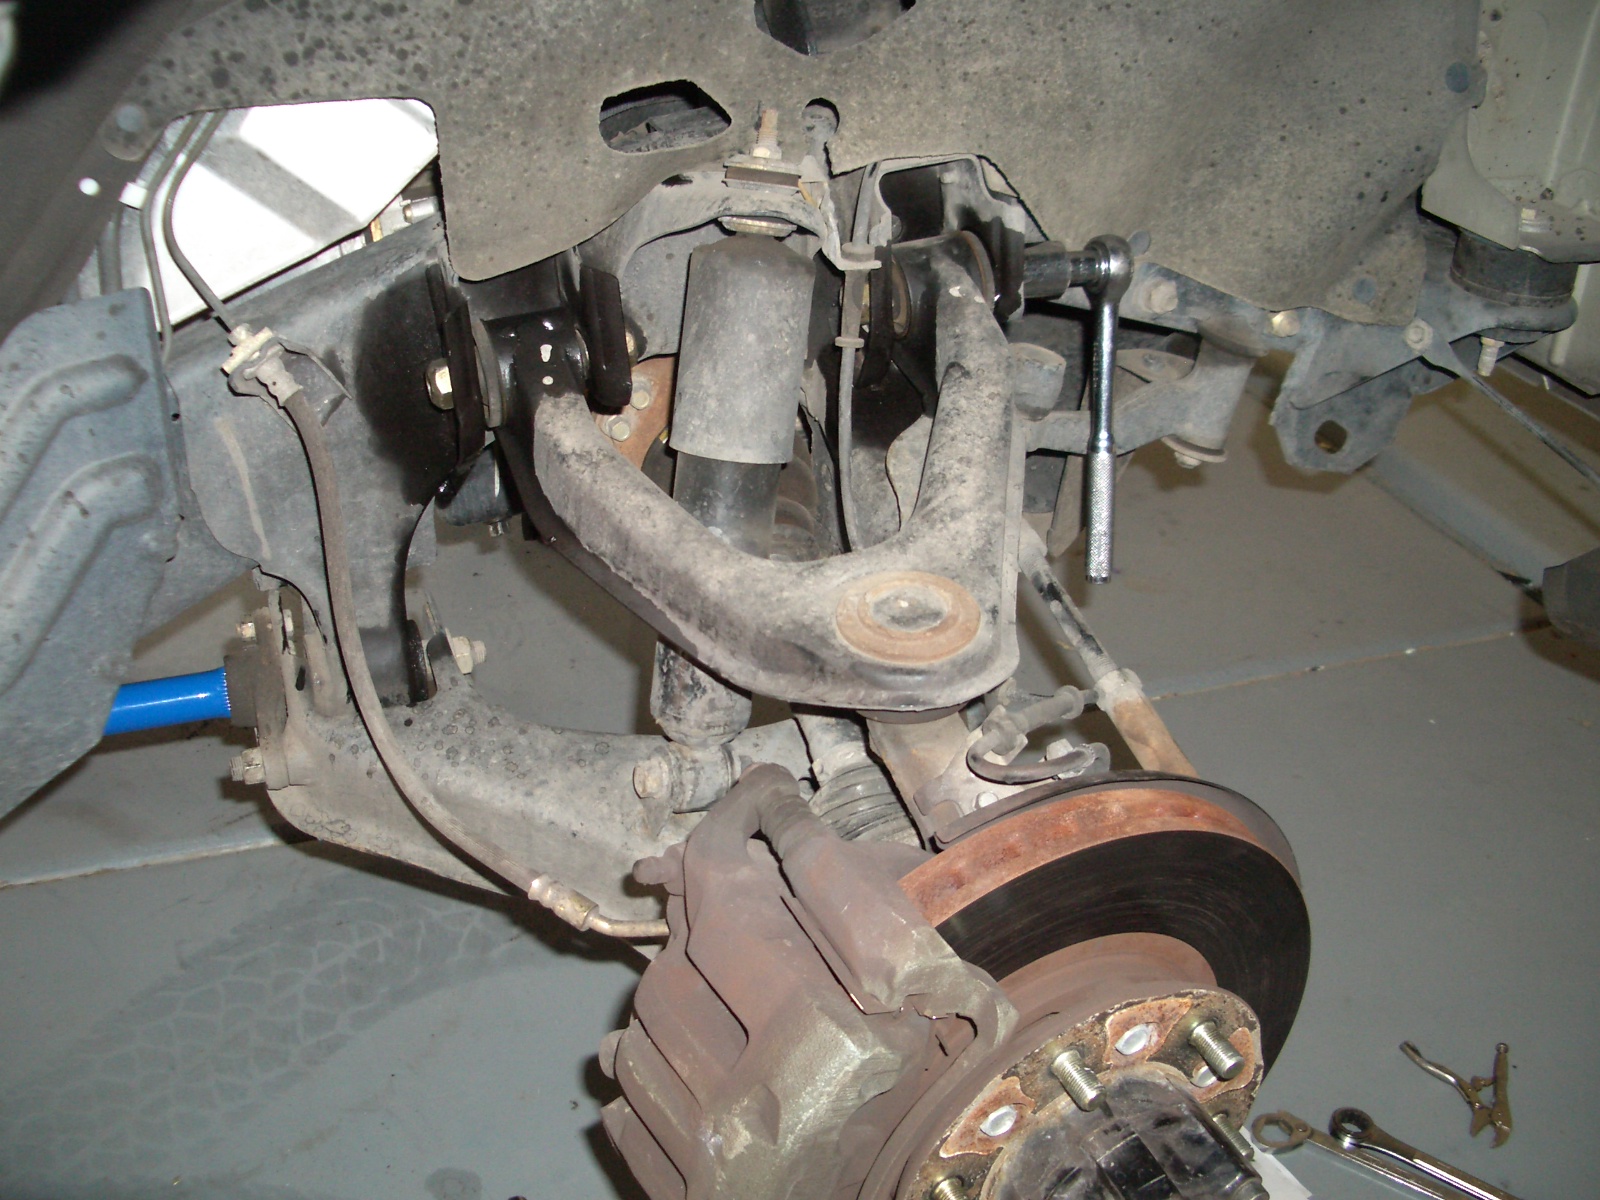
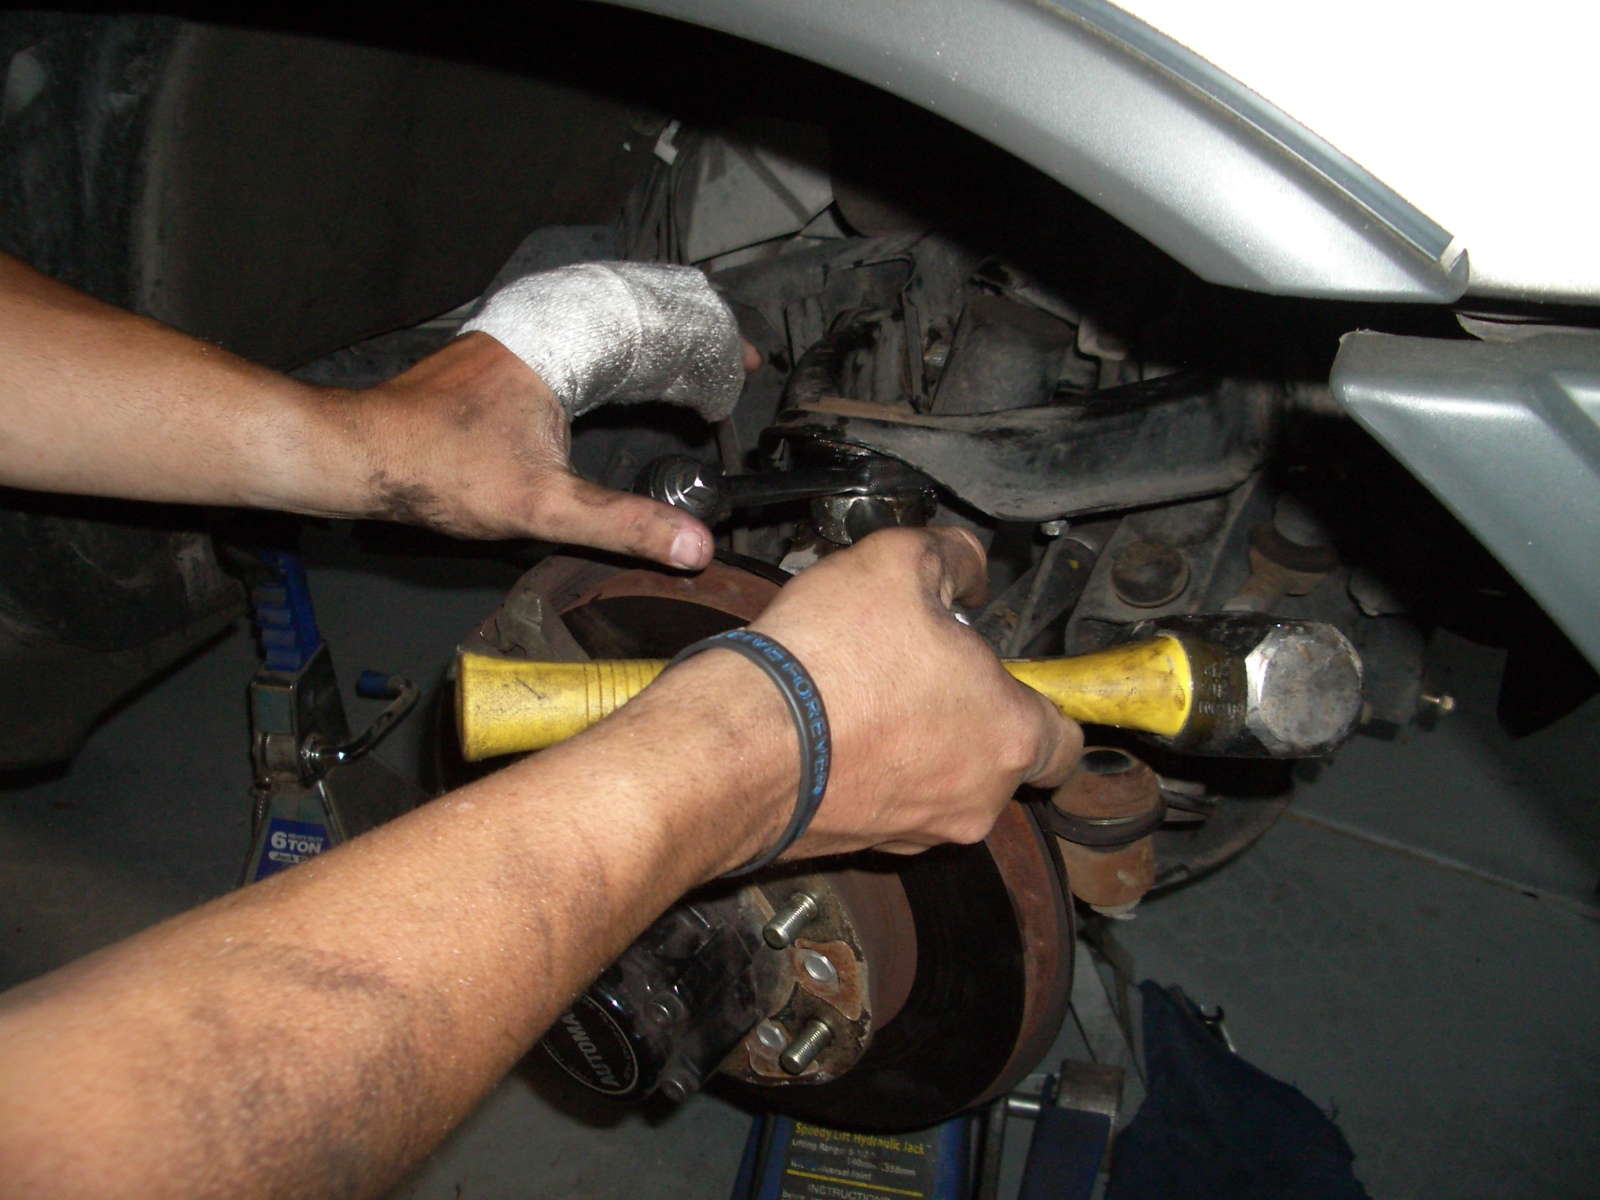
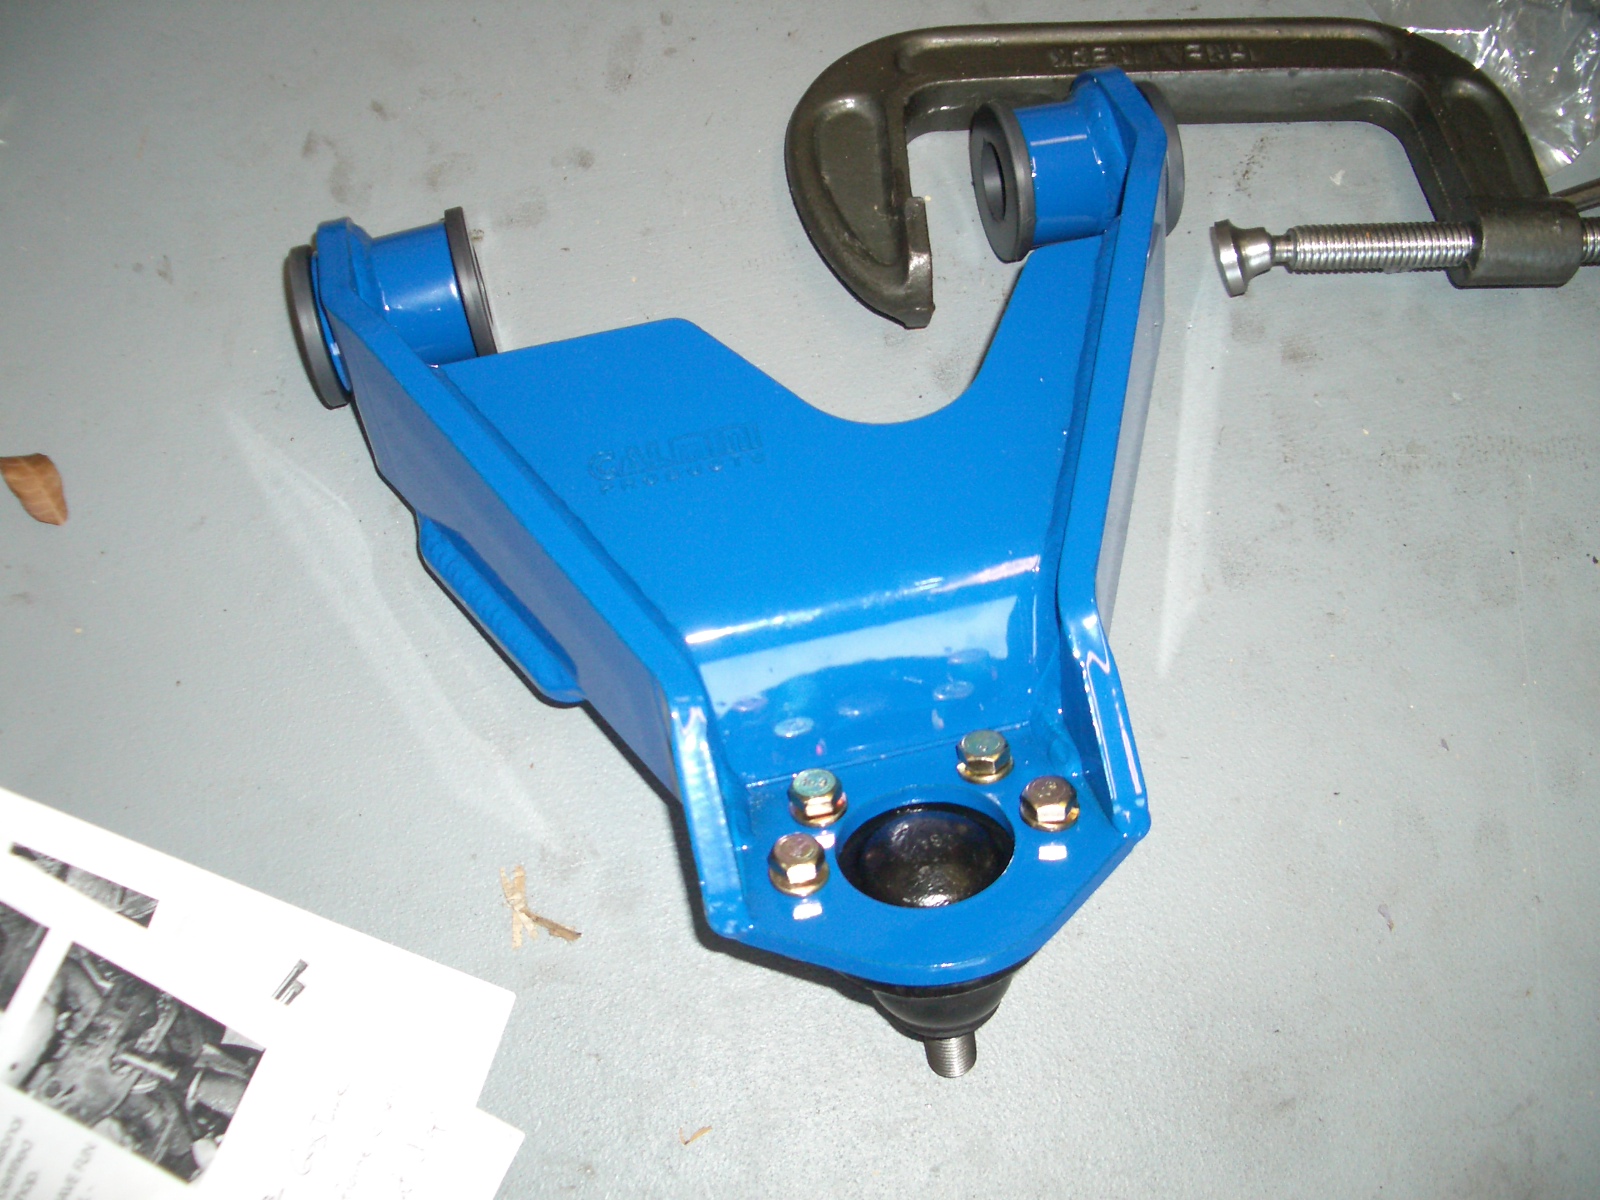
Remove/Install the Upper Control Arms:
This is the step that in the instructions, exists as only one sentence, but could take you in all actuality, anywhere from 1 to 5+ hours. The stock tapered bolt is such a punk to remove, it has driven people to insane lengths to remove. After removing the nut and the break line bracket attached to the arm, get ready to spend some quality time with your old arm. You might as well leave the arm mount bolts on for leverage but keep them soaking in Liquid Wrench. Another noteworthy thing not mentioned but extremely helpful would to be to mark the adjustable cam bolts so you're alignment's not too bad off when you reinstall.
Anyway, just keep telling yourself things like, I won't be needing any of the old parts, I can bend the brake shield back, and, you think you're better than me you ________. There are many ways people claim helped them remove the joint, but we tried everything short of using combustibles (to Chris's dismay) and it just comes down to the simple fact of how bad you want it. Sure, try different angles with the sledge, different sized pickle forks and breaker bars, using the weight of the vehicle, but like some other things in nature, when the time is right, the joint will know and it will know what to do. 5 hours of labor later, we got the best of both sides. One helpful effort came after we had stripped the joint clean of rubber and rings and then we aided our fork with a set of vise grips clamped onto the clean metal. Okay, insert the time frame you need & then celebrate your win with pizza cuz now you can finally stop swinging your battered red arms and install your new blue ones. All that has to be done is to set the bushing halves (grease) in and to bolt on the new ball joint. Then you can install them trying to get pretty close to your cam bolt alignment marks.
Remove/Install the Front Shocks:
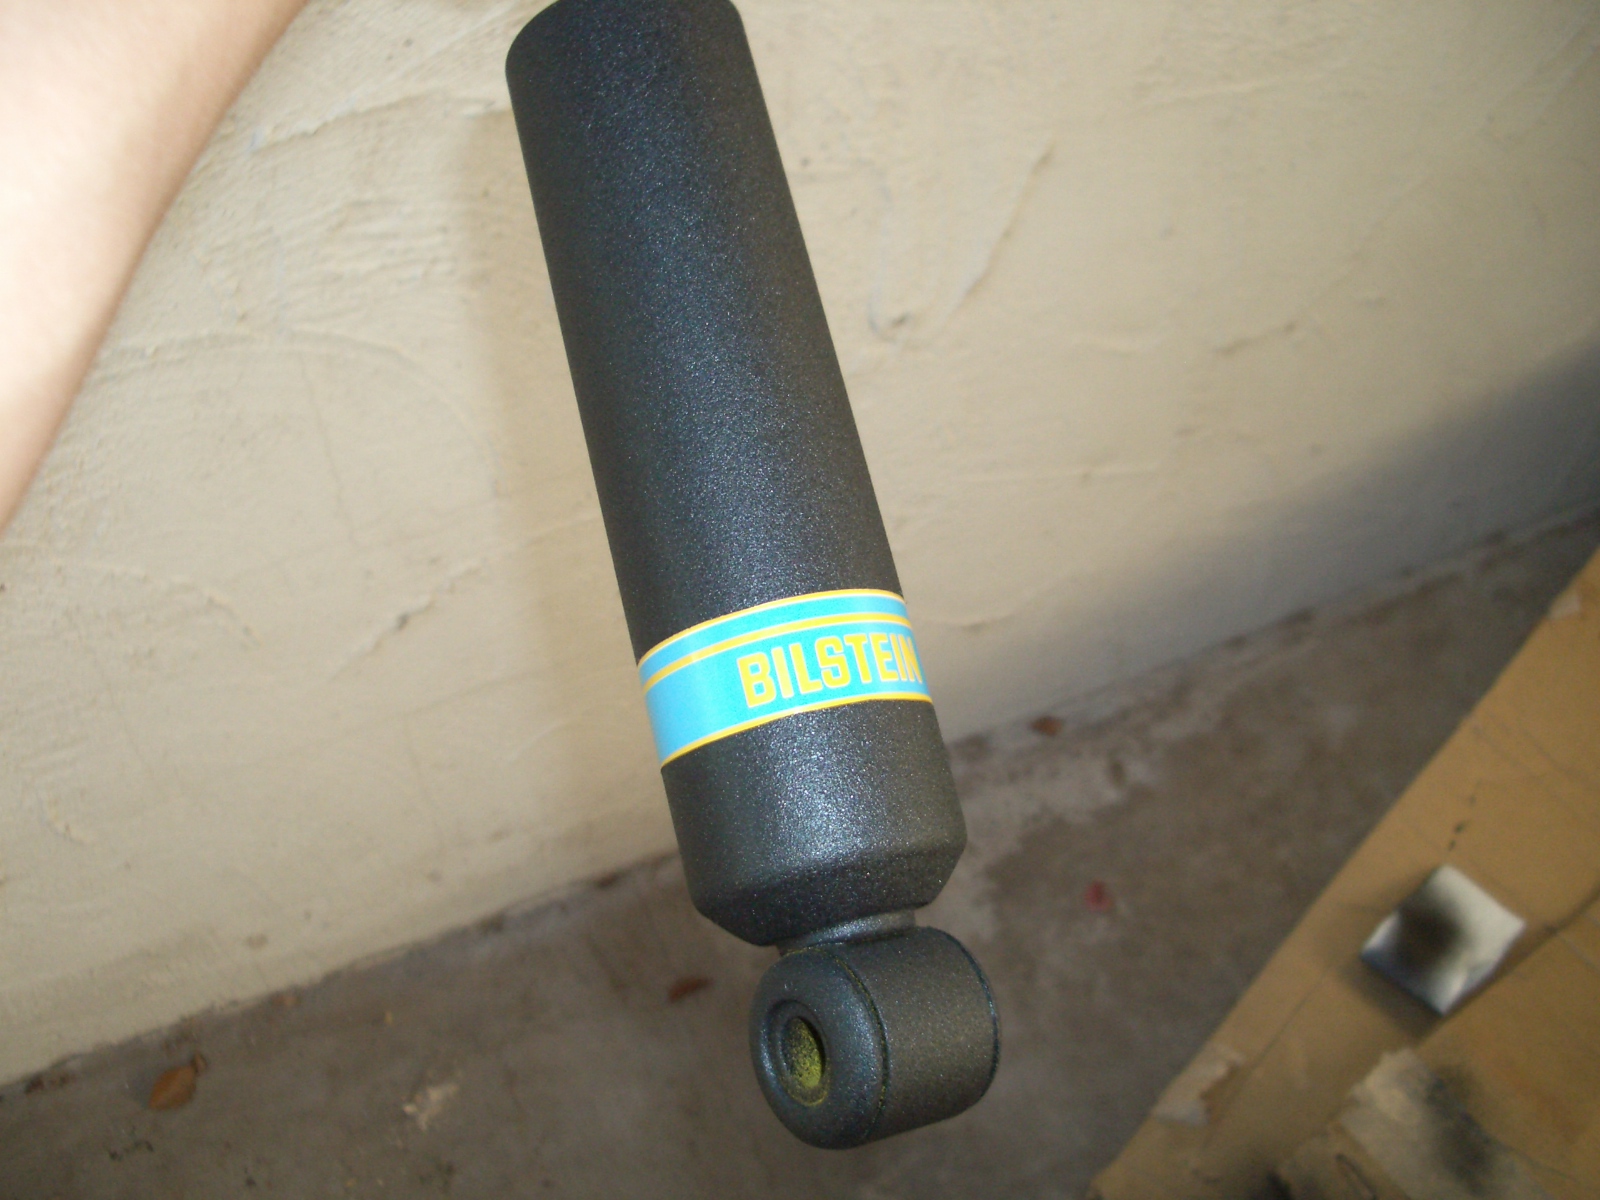
There's a lot of talk about Bilstein extended length shocks' performance, especially up against the ones included in the Calmini package . So I opted out of the Cal's ($100 off) and bought a set of Bil's from 4x4parts.com. Upon the recommendations on many other lifted X drivers out there on bulletin boards, I chose the 20% stiffer shocks all the way around. 20% for the back so the rear sway bar can be ditched and 20% up front to handle the beefy Shrockworks bumper I must have. The only prob I had with the Bil's is that it looks like a 3-year-old picked out the color scheme with the crayon yellow tubes and the pathetically flimsy plastic (non accordion-style) cornflower blue boots. So I cut off the boots and used the next best thing known to man besides duct tape, spray-on bed-liner to paint the corny colored shocks. I liked the way they came out and I made sure to tape over the label when I painted so all the chickies would still know I roll name brand style. |